1. Importing Data into Power Query
To begin, you'll need to import your dataset into Power Query:
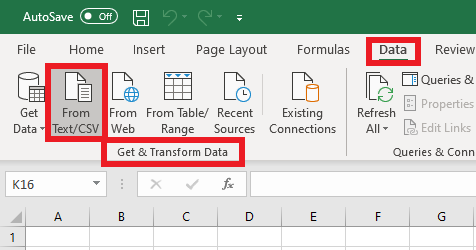
- Navigate to the Data Tab: In Excel, go to the Data tab on the ribbon.
- Select Data Source: Click on Get Data and choose your data source. Excel allows importing data from various sources, including Excel workbooks, text or CSV files, databases, and online services.
- Load Data: After selecting your data source, follow the prompts to load your data into Power Query. This action opens the Power Query Editor, where you can view and transform your data.
2. Understanding the Power Query Interface
The Power Query Editor provides a user-friendly interface for data transformation:
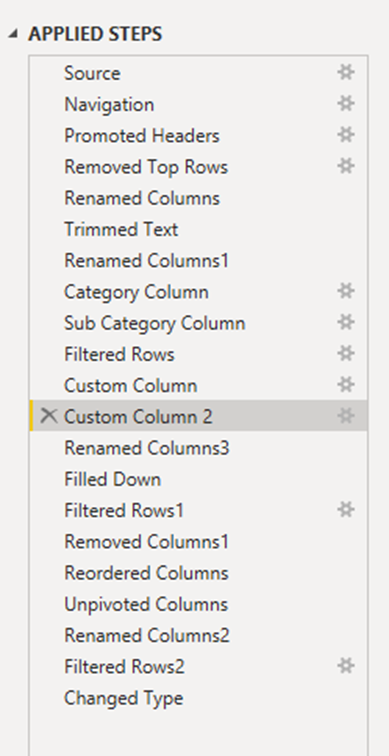
- Query Settings Pane: Displays the properties of the query and the applied steps.
- Ribbon: Contains various tools for data transformation.
- Data Preview: Shows a preview of your data after each transformation step.
- Applied Steps: Lists each transformation applied to the data, allowing you to track and modify steps as needed.
3. Cleaning Data with Power Query
Power Query offers a range of transformations to clean and organize your data:
- Removing Unnecessary Columns: Identify and remove columns that are not needed for your analysis. Right-click on the column header and select Remove.
- Filtering Rows: Filter out rows that contain irrelevant or erroneous data. Use the filter drop-down menus on column headers to apply conditions.
- Handling Missing Values: Address missing data by replacing null values or removing incomplete rows. Right-click on the column and choose Replace Values or use the Remove Rows option.
- Standardizing Text: Ensure consistency by trimming extra spaces and changing text casing. Use the Transform tab to access text formatting options.
- Changing Data Types: Set the correct data type for each column (e.g., text, number, date) to prevent errors in analysis. Click on the data type icon in the column header to change it.
4. Transforming Data for Analysis
Beyond cleaning, Power Query allows you to reshape your data:
- Unpivoting Columns: Transform columns into rows to normalize data, especially useful for datasets with pivoted data. Select the columns to unpivot, go to the Transform tab, and choose Unpivot Columns.
- Merging Queries: Combine data from multiple queries or tables based on a common column. Use the Merge Queries option under the Home tab.
- Grouping Data: Summarize data by grouping rows based on a column and applying aggregate functions like sum or average. Select the column to group by, then choose Group By under the Transform tab.
5. Loading Cleaned Data into Excel
Once you've cleaned and transformed your data:
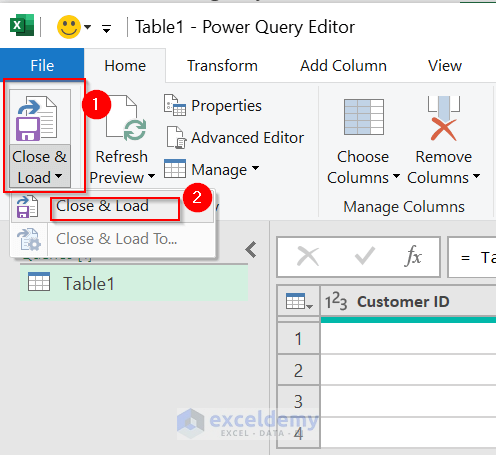
- Close & Load: Click on Close & Load in the Home tab of the Power Query Editor. Choose to load the data into a new worksheet or an existing one.
- Automate Future Imports: Power Query saves your transformation steps, allowing you to refresh the query with new data without repeating the cleaning process. Simply update the data source and click Refresh to apply the same transformations.
Conclusion
Mastering Power Query enhances your ability to handle and analyze data efficiently in Excel. By automating the import and cleaning process, you save time and reduce errors, enabling you to focus on deriving insights from your data.
If you found this guide helpful, subscribe to our newsletter for more Excel tips and tutorials. Also, check out our comprehensive Excel course designed to boost your data analysis skills.